Hello everyone, my name is Krushimantri, and I am excited to share my experience with you on oyster mushroom farming. Oyster mushroom farming is an eco-friendly and sustainable agricultural practice that involves growing oyster mushrooms for consumption and sale. Oyster mushrooms are highly valued for their unique taste and numerous health benefits, making them a popular ingredient in many dishes.
One of the best things about oyster mushroom farming is that it is an ideal option for small-scale farmers. It requires low investment and can be easily managed using simple techniques and equipment. The cultivation process involves using waste materials like sawdust, rice straw, and coffee husks as a substrate, which helps in recycling and reducing waste.
In addition to being environmentally friendly, oyster mushroom farming provides farmers with a high yield potential and a source of additional income. With its numerous benefits, oyster mushroom farming is an attractive option for farmers looking to diversify their agricultural practices.
In this blog post, I will delve into the world of oyster mushroom farming, sharing my experiences and insights on the topic. I hope you find this information useful and informative, as we explore the benefits of oyster mushroom farming and how it can be a profitable and sustainable agricultural practice.
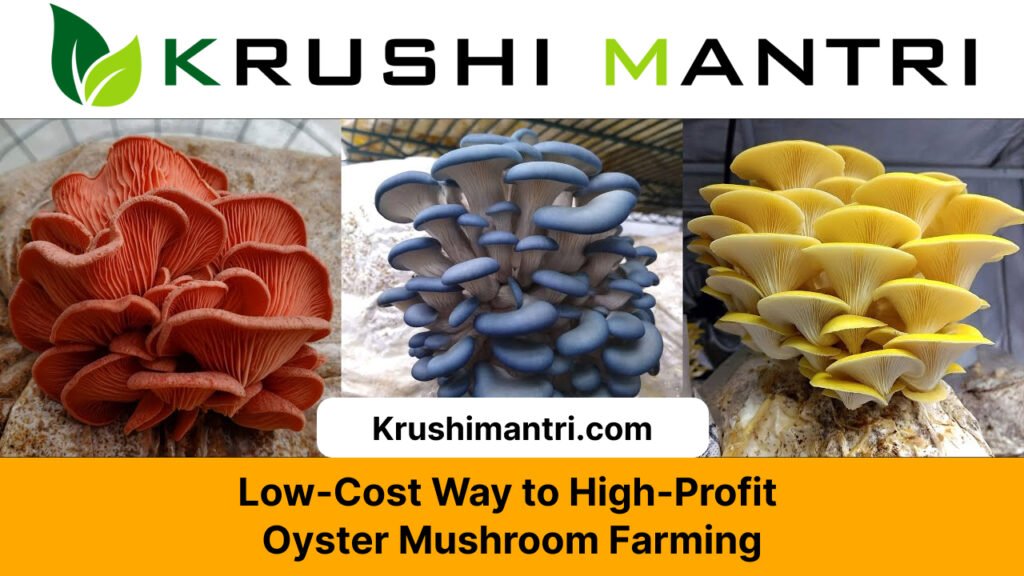
Oyster mushroom farming benefits and profit for farmer
- High Yield: Oyster mushrooms have a short cultivation period and can be harvested within 3-4 weeks. They also have a high yield potential of up to 25-30% of the substrate weight.
- Low Investment: Oyster mushroom farming requires low investment compared to other crops. It can be done using simple techniques and equipment, and can be easily managed by a small-scale farmer.
- Sustainable: Oyster mushroom farming is a sustainable and eco-friendly farming method. It involves the use of waste materials like sawdust, rice straw, and coffee husks as a substrate, which helps in recycling and reducing waste.
- Nutritious: Oyster mushrooms are a good source of protein, vitamins, and minerals. They contain essential amino acids and are rich in antioxidants, making them a healthy food option.
- Demand: Oyster mushrooms have a high demand in the market due to their unique taste and health benefits. They are used in a variety of dishes, making them a popular ingredient in restaurants and food processing companies.
- Long Shelf Life: Oyster mushrooms have a long shelf life compared to other fresh produce. They can be stored for up to two weeks without losing their nutritional value and taste.
- Additional Income: Oyster mushroom farming can provide an additional source of income for farmers. They can sell their produce directly to the market or to food processing companies for further processing.
- Easy Marketing: Oyster mushrooms have a good market demand and are easy to sell. They can be sold fresh or dried, making them a versatile product for marketing.
Here’s how I applied my methods in growing oyster mushrooms at home step by step:
Step 1: Preparation
The first thing to do is to determine the type of oyster mushroom you want to cultivate. I found the Pearl, Blue, Phoenix, Golden, Pink, and King oyster mushrooms to be the most frequently available types. I then selected the substrate, which is the material that provides the necessary nourishment for mushroom mycelium growth. Straw is the most commonly used substrate, but other materials such as sawdust, cardboard, coffee grounds, sugarcane bagasse, coco coir, and cotton waste can also be used.
Initially, you must determine the type of oyster mushroom you intend to cultivate.
Pearl oyster mushroom (Pleurotus ostreatus)
The pearl oyster mushroom, also known as common oyster mushroom, winter oyster mushroom, or grey oyster mushroom, is among the frequently obtainable varieties. These mushrooms flourish better in colder temperatures.
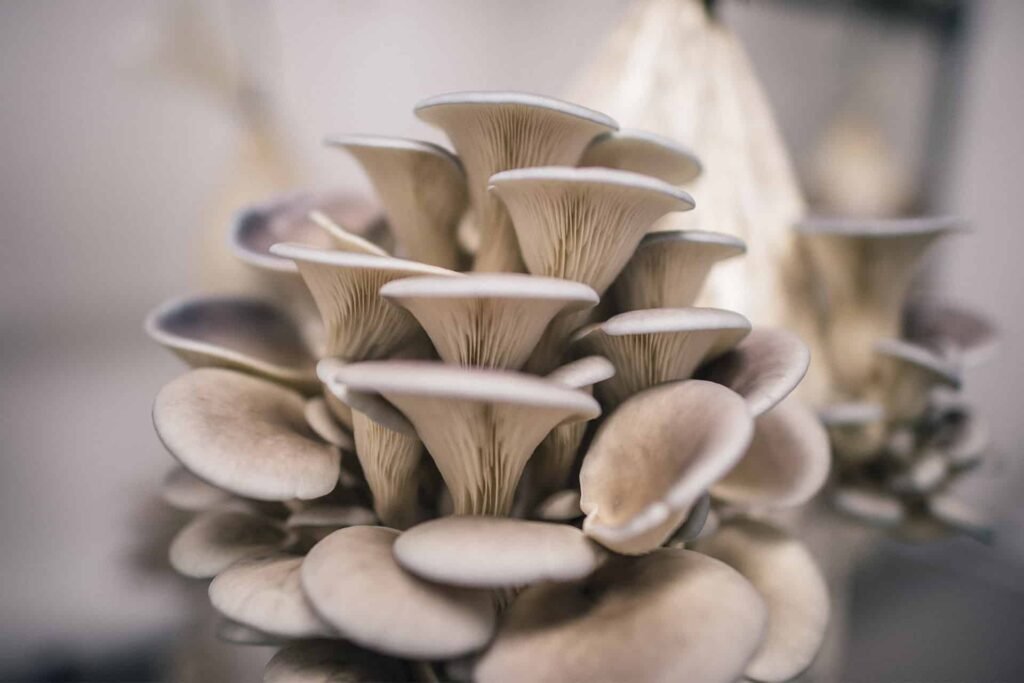
Blue oyster mushroom (Pleurotus ostreatus var. columbinus)
The blue oyster mushroom, a subspecies of the common oyster, is prevalent across the northern hemisphere. It is among the fastest colonizers of all oyster mushroom types and thrives in colder temperatures ranging from 45-65 F (12-18 C).
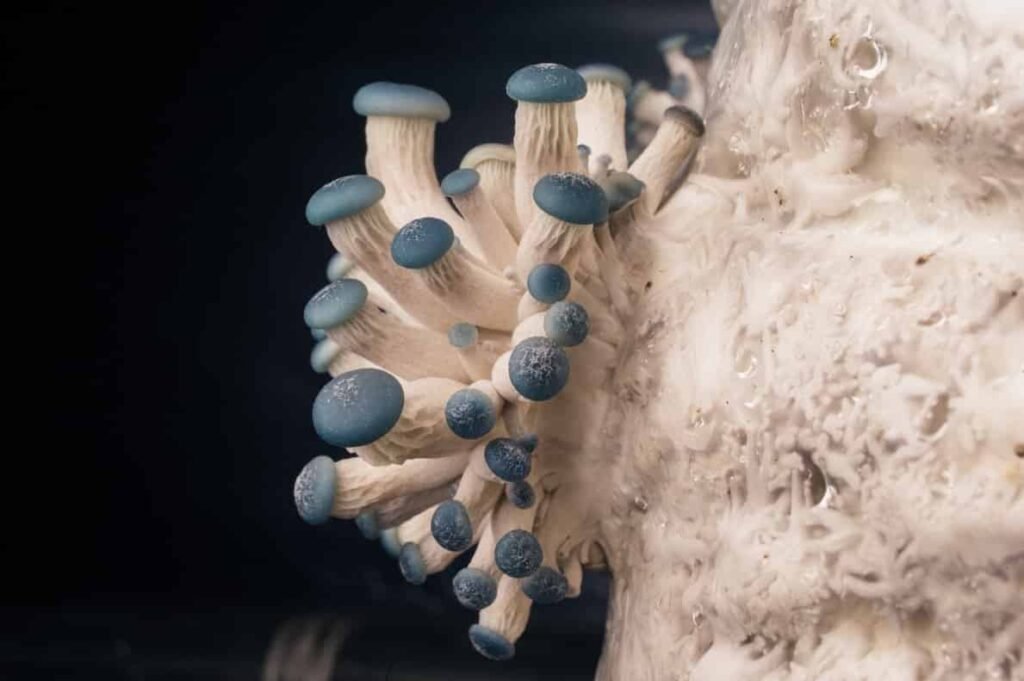
Phoenix oyster mushroom (Pleurotus pulmonarius)
The phoenix oyster mushroom, alternatively referred to as the summer oyster mushroom, Italian oyster mushroom, or Indian oyster mushroom, has adapted to flourish in warmer climates. The color of these mushrooms may vary depending on the strain, either white or brown/tan.
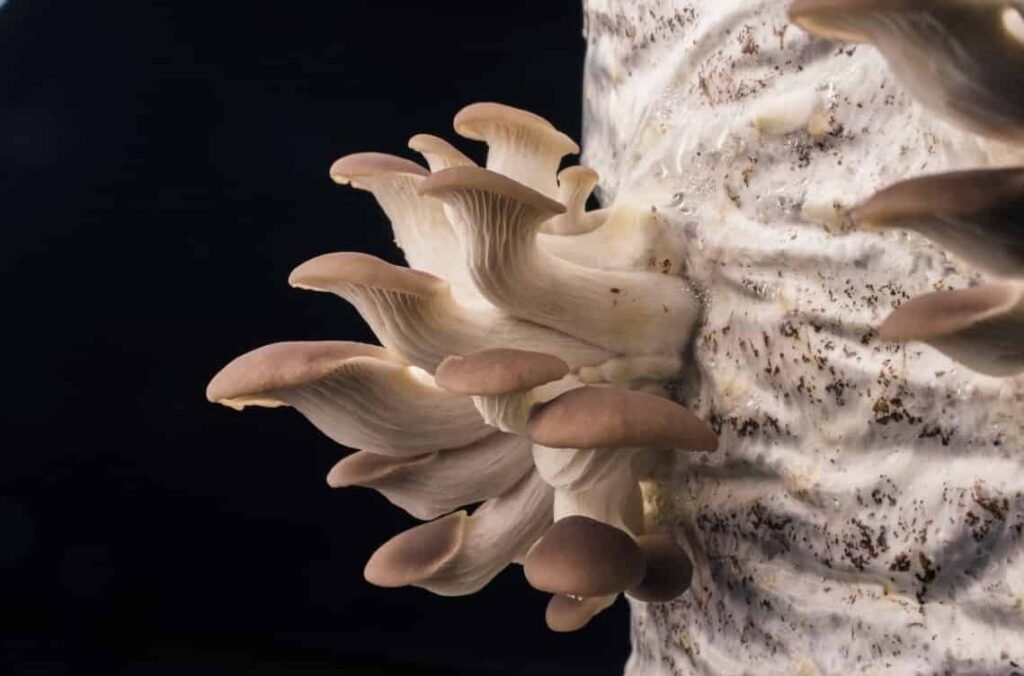
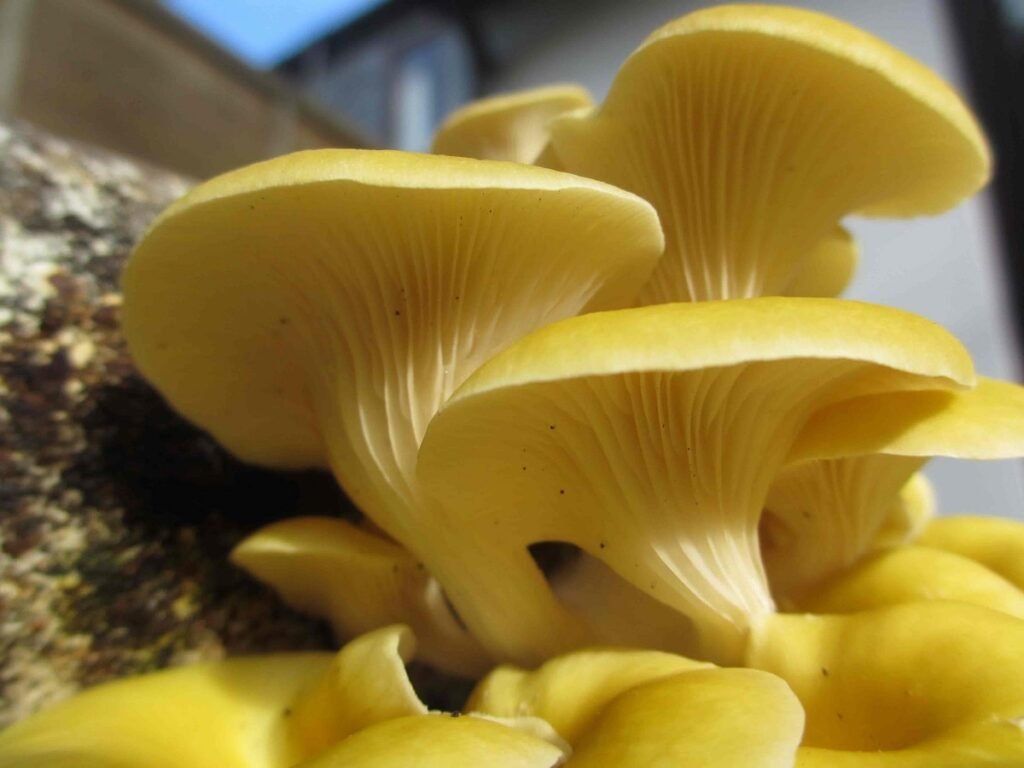
Golden oyster mushroom (Pleurotus citrinopileatus)
Also known as yellow oyster mushrooms, this variety is renowned for its vivid color and resemblance to the popular chanterelle mushroom. They thrive in warmer temperatures ranging from 64-86F (18C-30C).
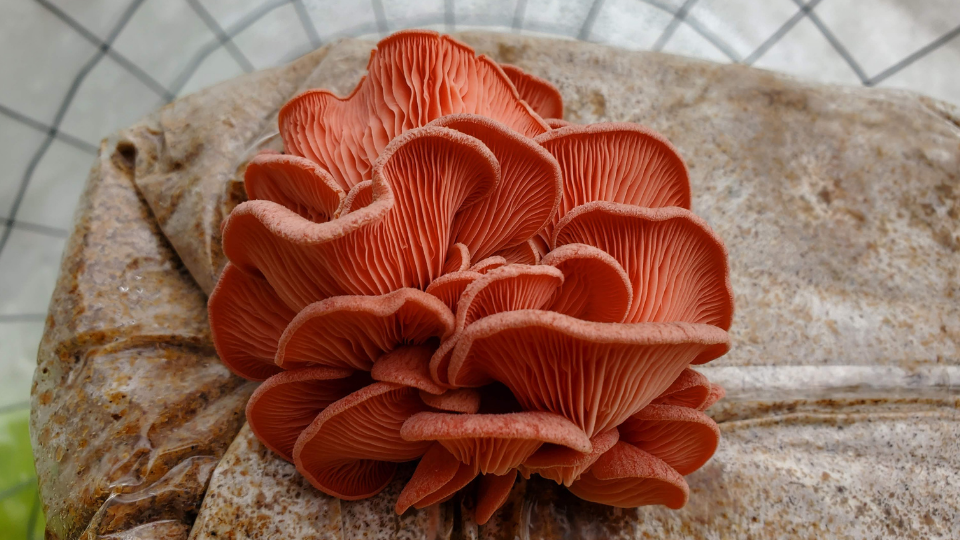
Pink oyster mushroom (Pleurotus djamor)
The pink oyster mushroom is an impressive variety among oyster mushrooms as it grows rapidly and yields fruits within just 3-4 weeks. These mushrooms grow well in warmer temperatures of 64-86F (18C-30C).
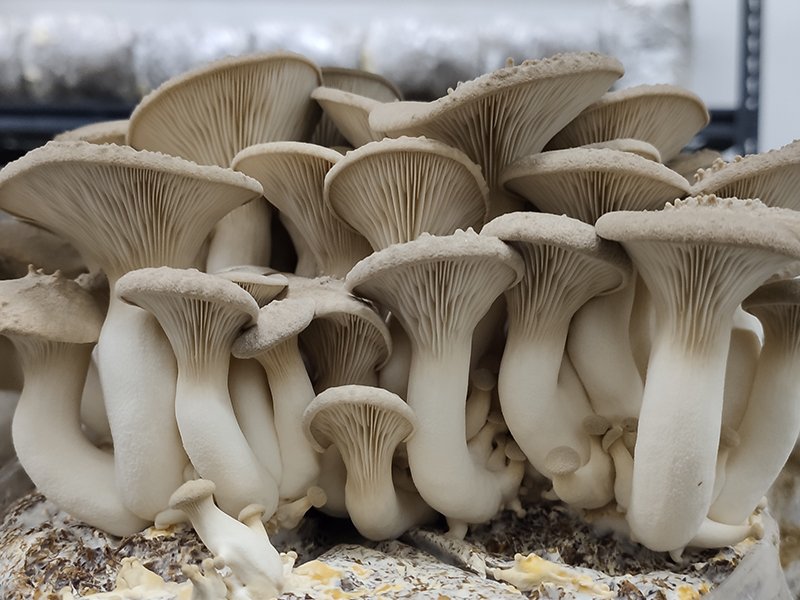
King oyster mushroom (Pleurotus eryngii)
The eryngii mushroom, commonly referred to as king trumpet mushroom, boasts of a firm texture and delightful meaty taste. Compared to other oyster mushrooms, it is more challenging to cultivate and hence not recommended for beginners. The ideal temperature range for its cultivation is between 45-65 F (12C-18C).
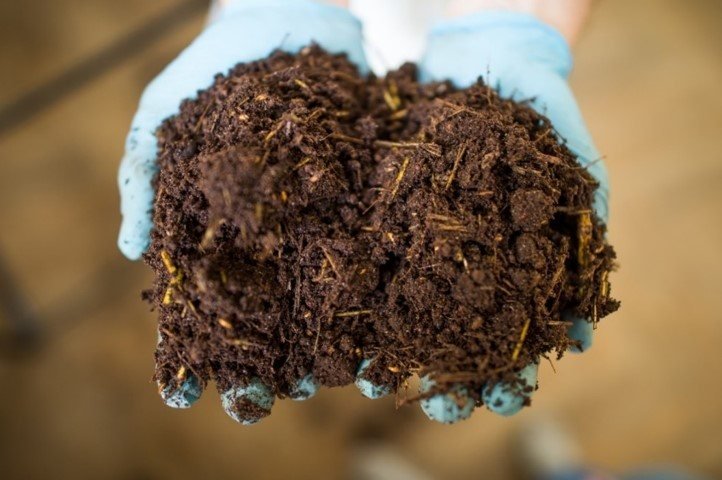
Select the substrate for growing oyster mushrooms.
Substrates provide the necessary nourishment for mushroom mycelium growth. Mycelium is a critical vegetative growth of the fungus, similar to an apple tree’s role in apple cultivation. The widely used substrate for oyster mushrooms is straw.
Still, other substrates such as sawdust, cardboard, coffee grounds, sugarcane bagasse, coco coir, and cotton waste can also be used. The selection of substrate depends on the ease of sourcing. Wood pellets are an easy substrate to start with as they come pre-pasteurized and require only hydration.
Straw is also a forgiving substrate for cultivation. Choose a substrate that you can easily obtain and follow the instructions for inoculation. If making a substrate seems daunting, ready-to-fruit oyster mushroom blocks, which come fully colonized and prepared to grow, can also be purchased.
Step 2: Preparation of Oyster Mushroom Substrate.
The substrate must be hydrated and nutrient-rich, free from other microorganisms that could hinder the growth of mushroom mycelium. I decided to use straw, which is cost-effective, nutrient-rich, and conducive to mushroom growth. I pasteurized it by soaking it in hot water for 1-2 hours. I also considered sawdust pellets, which are pasteurized by the heat and pressure of the pellet production process. Waste coffee grounds are also a readily available resource that is already pasteurized. I used fresh grounds and mixed them with straw.
Straw and cardboard
The preferred substrate for cultivating oyster mushrooms is straw, which is cost-effective, nutrient-rich, and conducive to their growth. To prepare the straw for cultivation, it needs to be pasteurized by soaking it in hot water (65-80°C / 149-176°F) for 1-2 hours, or in a cold water high-pH lime bath for 12-18 hours.
Sawdust Pellets
Using these pellets has the advantage of being pasteurized by the heat and pressure of the pellet production process. To prepare them for mushroom cultivation, soak them in water of equal weight for 30 minutes, then mix to break up the pellets into hydrated sawdust.
Coffee Grounds
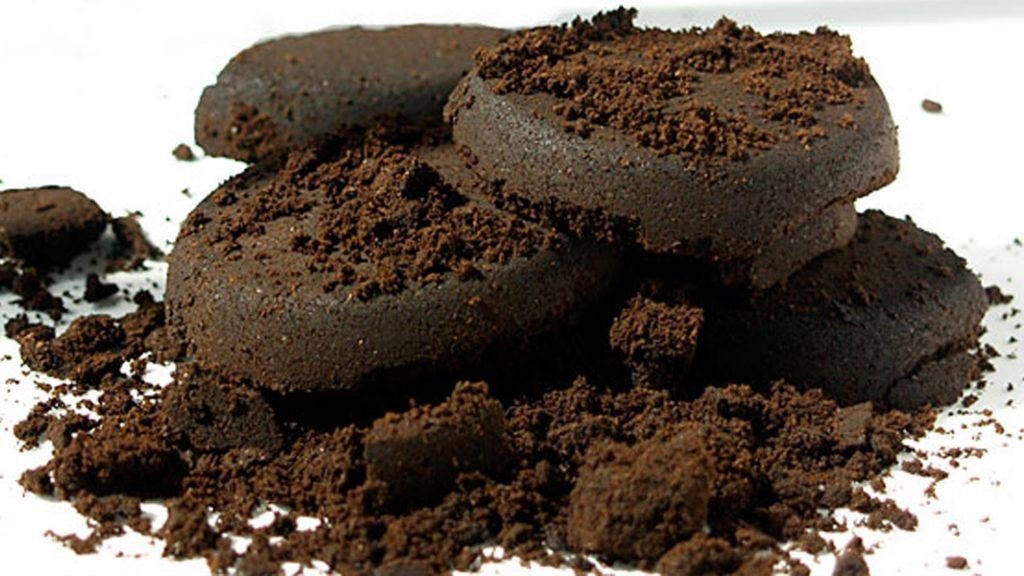
Waste coffee grounds are a readily available resource that is already pasteurized. Despite the abundance of misinformation on the internet, using coffee grounds as a substrate for oyster mushroom cultivation can be effective. However, it is essential to use fresh grounds (within 24 hours of brewing) as they are already pasteurized and hydrated through the brewing process. Beyond this timeframe, competing molds may develop, which can outcompete your mycelium. While coffee grounds can be used as a substrate on its own in small quantities (1kg or less), it is recommended to mix in 20-50% of straw when scaling up. To learn more, you can refer to our article on growing mushrooms using coffee grounds.
Step 3: Inoculation
Inoculation is the process of introducing the mushroom spawn to the prepared substrate. Before mixing the spawn, I made sure to clean my hands with soap and wiped down all surfaces with a cleaning spray. I checked the substrate’s moisture content and made sure it was not excessively dry or too wet by conducting a squeeze test. I then mixed the spawn with the substrate and placed it in a container.
It is crucial to ensure that the substrate has the appropriate moisture content. The pasteurization process usually moisturizes the substrate to the correct level, but it is crucial to verify that it is not excessively dry or too wet. Depending on the material used, the ideal hydration level can range from 55% (for sawdust and coffee grounds) to 74% (for straw), which can be determined by conducting a squeeze test.
Perform a squeeze test by slightly squeezing the substrate in your hand. It should bind into a ball in your hand, and a few drops of water should come out. If more than this occurs, you need to dry out the substrate. If it does not hold together in your hand, it is likely too dry, and more water should be added.
Next, mix the substrate and mushroom spawn in a container, such as a large plastic box or barrel. Then, load the substrate into your growing vessels and secure the top using a rubber band, paperclip, tape, or tie.
If you are not using a filter patch bag, create a few small holes every 10 centimeters around the bag to facilitate air exchange. For a practical demonstration of the inoculation process, check out this brief instructional video where coffee and straw are used as the substrate.

| Inoculation Instructions |
|---|
| Clean work surface and mixing container |
| Weigh out all materials before mixing |
| Mix thoroughly, breaking up any pucks of coffee as you go |
| Fill grow bags & seal |
| 3kg fresh coffee grounds |
| 600g pasteurized straw |
| 300g oyster mushroom spawn |
Step 4: Incubation
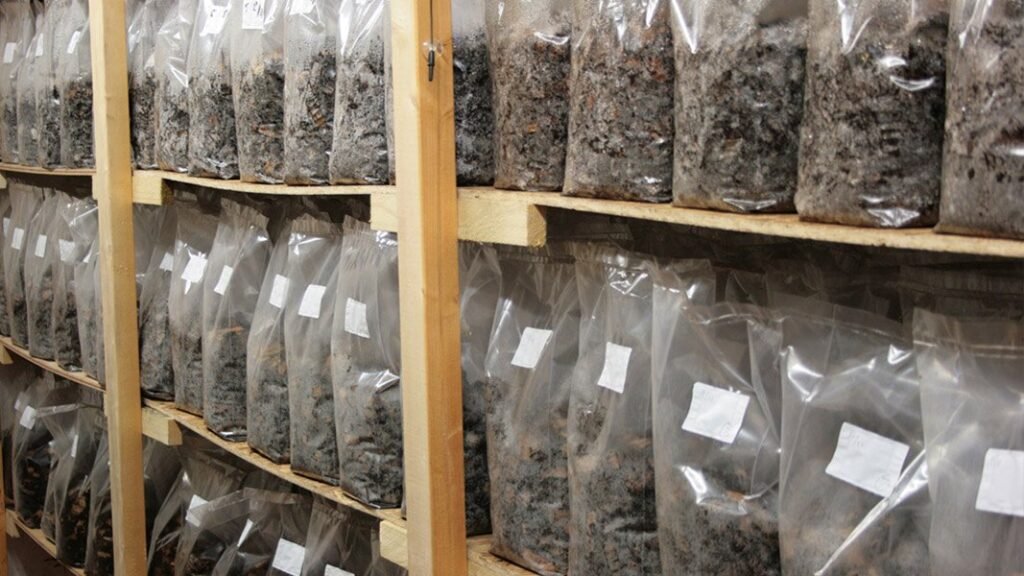
After inoculation, I placed the container in a warm and dark place, ideally between 20-25°C (68-77°F), to encourage the mycelium’s growth. I checked on the container regularly, ensuring that it maintained the ideal temperature and that it was not exposed to direct sunlight.
Frequent issues encountered during incubation:
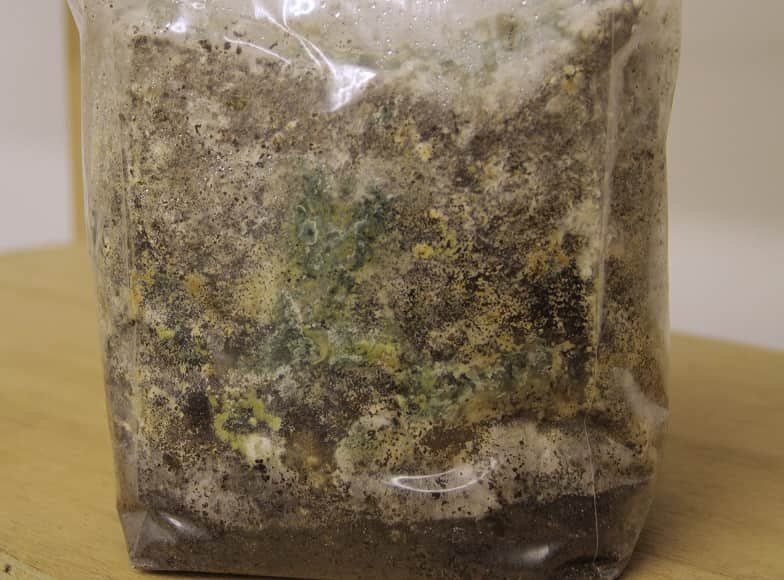
It is crucial to monitor your bags for the growth of blue or green mold. If you notice a small amount, your spawn may still overpower it. However, if there is a considerable amount, it may lead to the failure of your grow, and you must compost your substrate and restart the process.
Step 5: Fruiting
After about 2-3 weeks, mycelium should have colonized the substrate, and small primordia (baby mushrooms) should start to appear. I then moved the container to an area that gets indirect sunlight to encourage the mushrooms to grow. I sprayed water on the substrate every day to maintain the appropriate humidity level, around 80%.
The moment you have been eagerly waiting for has arrived!
After all the hard work, it’s time to harvest the delectable oyster mushrooms. In nature, mushrooms grow in response to stress or changes in their surroundings, such as a scarcity of food. To cultivate mushrooms at home or in your garden, you need to mimic this natural process.
Once the mycelium has colonized the bag entirely, with the food source running out, it will trigger the mushrooms’ growth as a means of survival. Your role is to provide the ideal conditions for the mushrooms to thrive.
Lighting: Direct sunlight is not recommended, but the fruit bodies require some indirect or shaded light to develop appropriately. They do not obtain energy from the light, so an indirect light source or a shaded windowsill would be adequate.
Fresh Air: In natural settings, oyster mushrooms thrive in fresh, oxygen-rich air while growing on stumps or logs. By providing a 5cm hole or slit in the bag, you can indicate to the mycelium that there is space for growth.
Humidity: Spraying water twice a day is necessary to keep the substrate moist and the mushroom-growing environment humid. This will facilitate mushroom growth and prevent drying during development.
Temperature: Although specific to each strain, most oyster mushroom strains (excluding king oysters) are not overly demanding regarding the temperature at which they grow. Although they will develop best in their ideal range, as specified in the strain information, they should still produce mushrooms as long as the temperature is within the range of 10-30°C (50-86°F).
Within a week, small mushroom pins should begin emerging from the hole.
Over the next 5-7 days, you will witness a stunning natural phenomenon as these infant mushrooms double in size every day (remember to spray twice a day to maintain humidity as they grow).
Frequent issues encountered during Fruiting:
If you notice the drying out of your substrate or mushrooms (yellow or brown appearance)
spray more frequently.
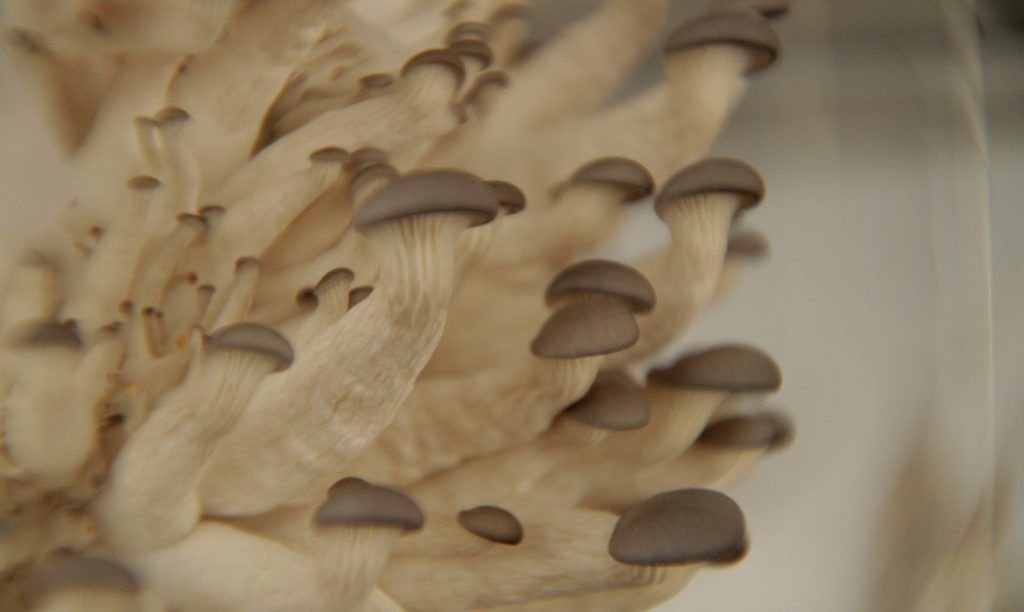
Long, thin oyster mushroom stems indicate high CO2 levels in the room.
In such cases, opening the window a couple of times a day can increase the oxygen levels.
Step 6: Harvesting and Growing Further Crops
When the mushrooms are fully grown, I harvested them by twisting them off gently. I made sure to twist rather than pull to avoid damaging the substrate. I then stored the harvested mushrooms in a container in the fridge to keep them fresh.
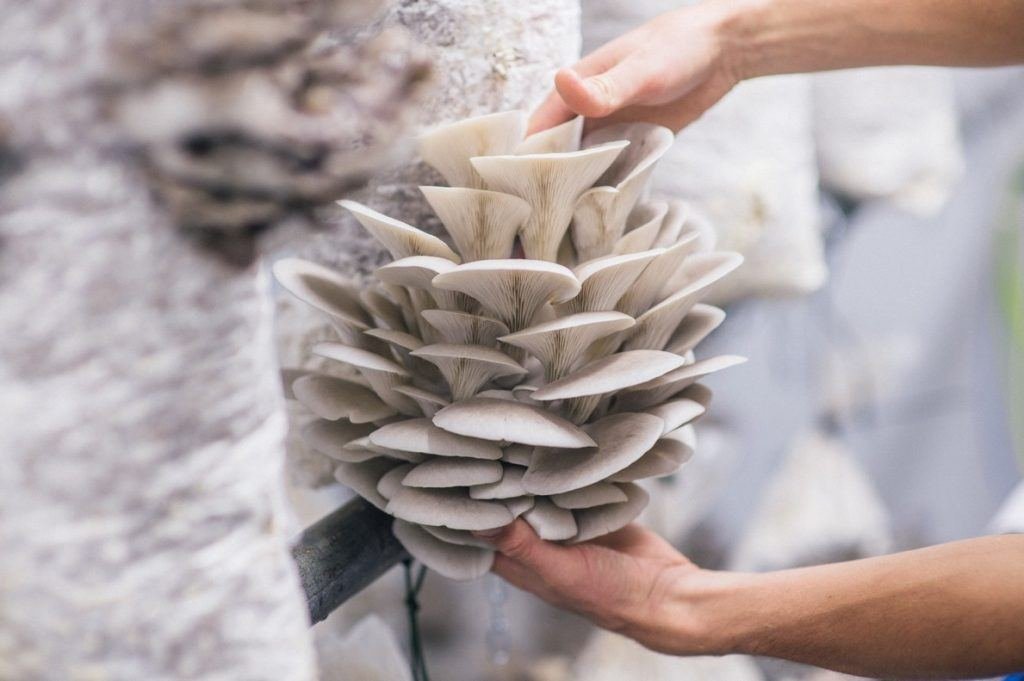
Harvest the mushrooms by twisting them off with your hands or cutting the cluster off with a knife.
Use the harvested mushrooms to cook delicious oyster mushroom recipes.
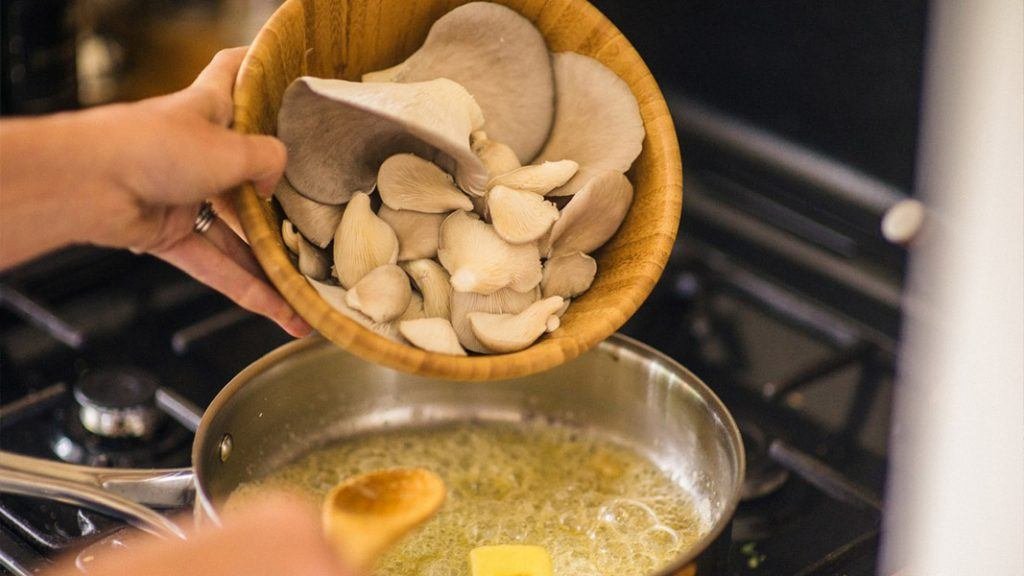
After two days, rehydrate the mushroom substrate by submerging it in water overnight and follow the same instructions from Step 5: Fruiting.
Spray the substrate twice a day in the same hole you cut earlier, and in 1-2 weeks, more mushrooms will start to emerge.
Repeat this process for a smaller third crop before the substrate runs out of nutrients.
Once the substrate is depleted, break it up and add it to your compost or use it as a mulch/top layer dressing for your garden soil.
The advantages of consuming oyster mushrooms for health.
- Low in calories: Oyster mushrooms are low in calories, making them a great addition to a weight-loss diet.
- Rich in nutrients: Oyster mushrooms are a good source of nutrients, including protein, fiber, potassium, and folate.
- Boost immune system: Oyster mushrooms contain beta-glucans, which can help boost the immune system and reduce inflammation.
- Lower cholesterol: Oyster mushrooms contain lovastatin, a compound that can help lower cholesterol levels in the blood.
- May help prevent cancer: Oyster mushrooms contain antioxidants that may help prevent cancer and reduce the risk of tumor growth.
- Improve brain function: Oyster mushrooms contain ergothioneine, which has been linked to improved cognitive function and reduced risk of neurodegenerative diseases.
- Improve heart health: Oyster mushrooms contain compounds that can help improve heart health by reducing inflammation, lowering blood pressure, and improving circulation.
- Anti-inflammatory properties: Oyster mushrooms contain anti-inflammatory compounds that may help reduce the risk of chronic diseases, such as arthritis and diabetes.
- Vegan and gluten-free: Oyster mushrooms are a great option for vegans and those on a gluten-free diet as they are naturally free from both animal products and gluten.
We hope this blog is vital for you; hence more information regarding any agriculture sector, stay tuned with Krushimantri.com
And more information regarding any travel, stay turned with urbanchats.com

